Workflow Setup
-
Create a Spell with Manual Inputs in Respell
- Log in to your Respell account and create a new spell that uses Bland AI to make a phone call.
- Ensure the spell requires manual inputs, such as the name of the person and phone number to call.
-
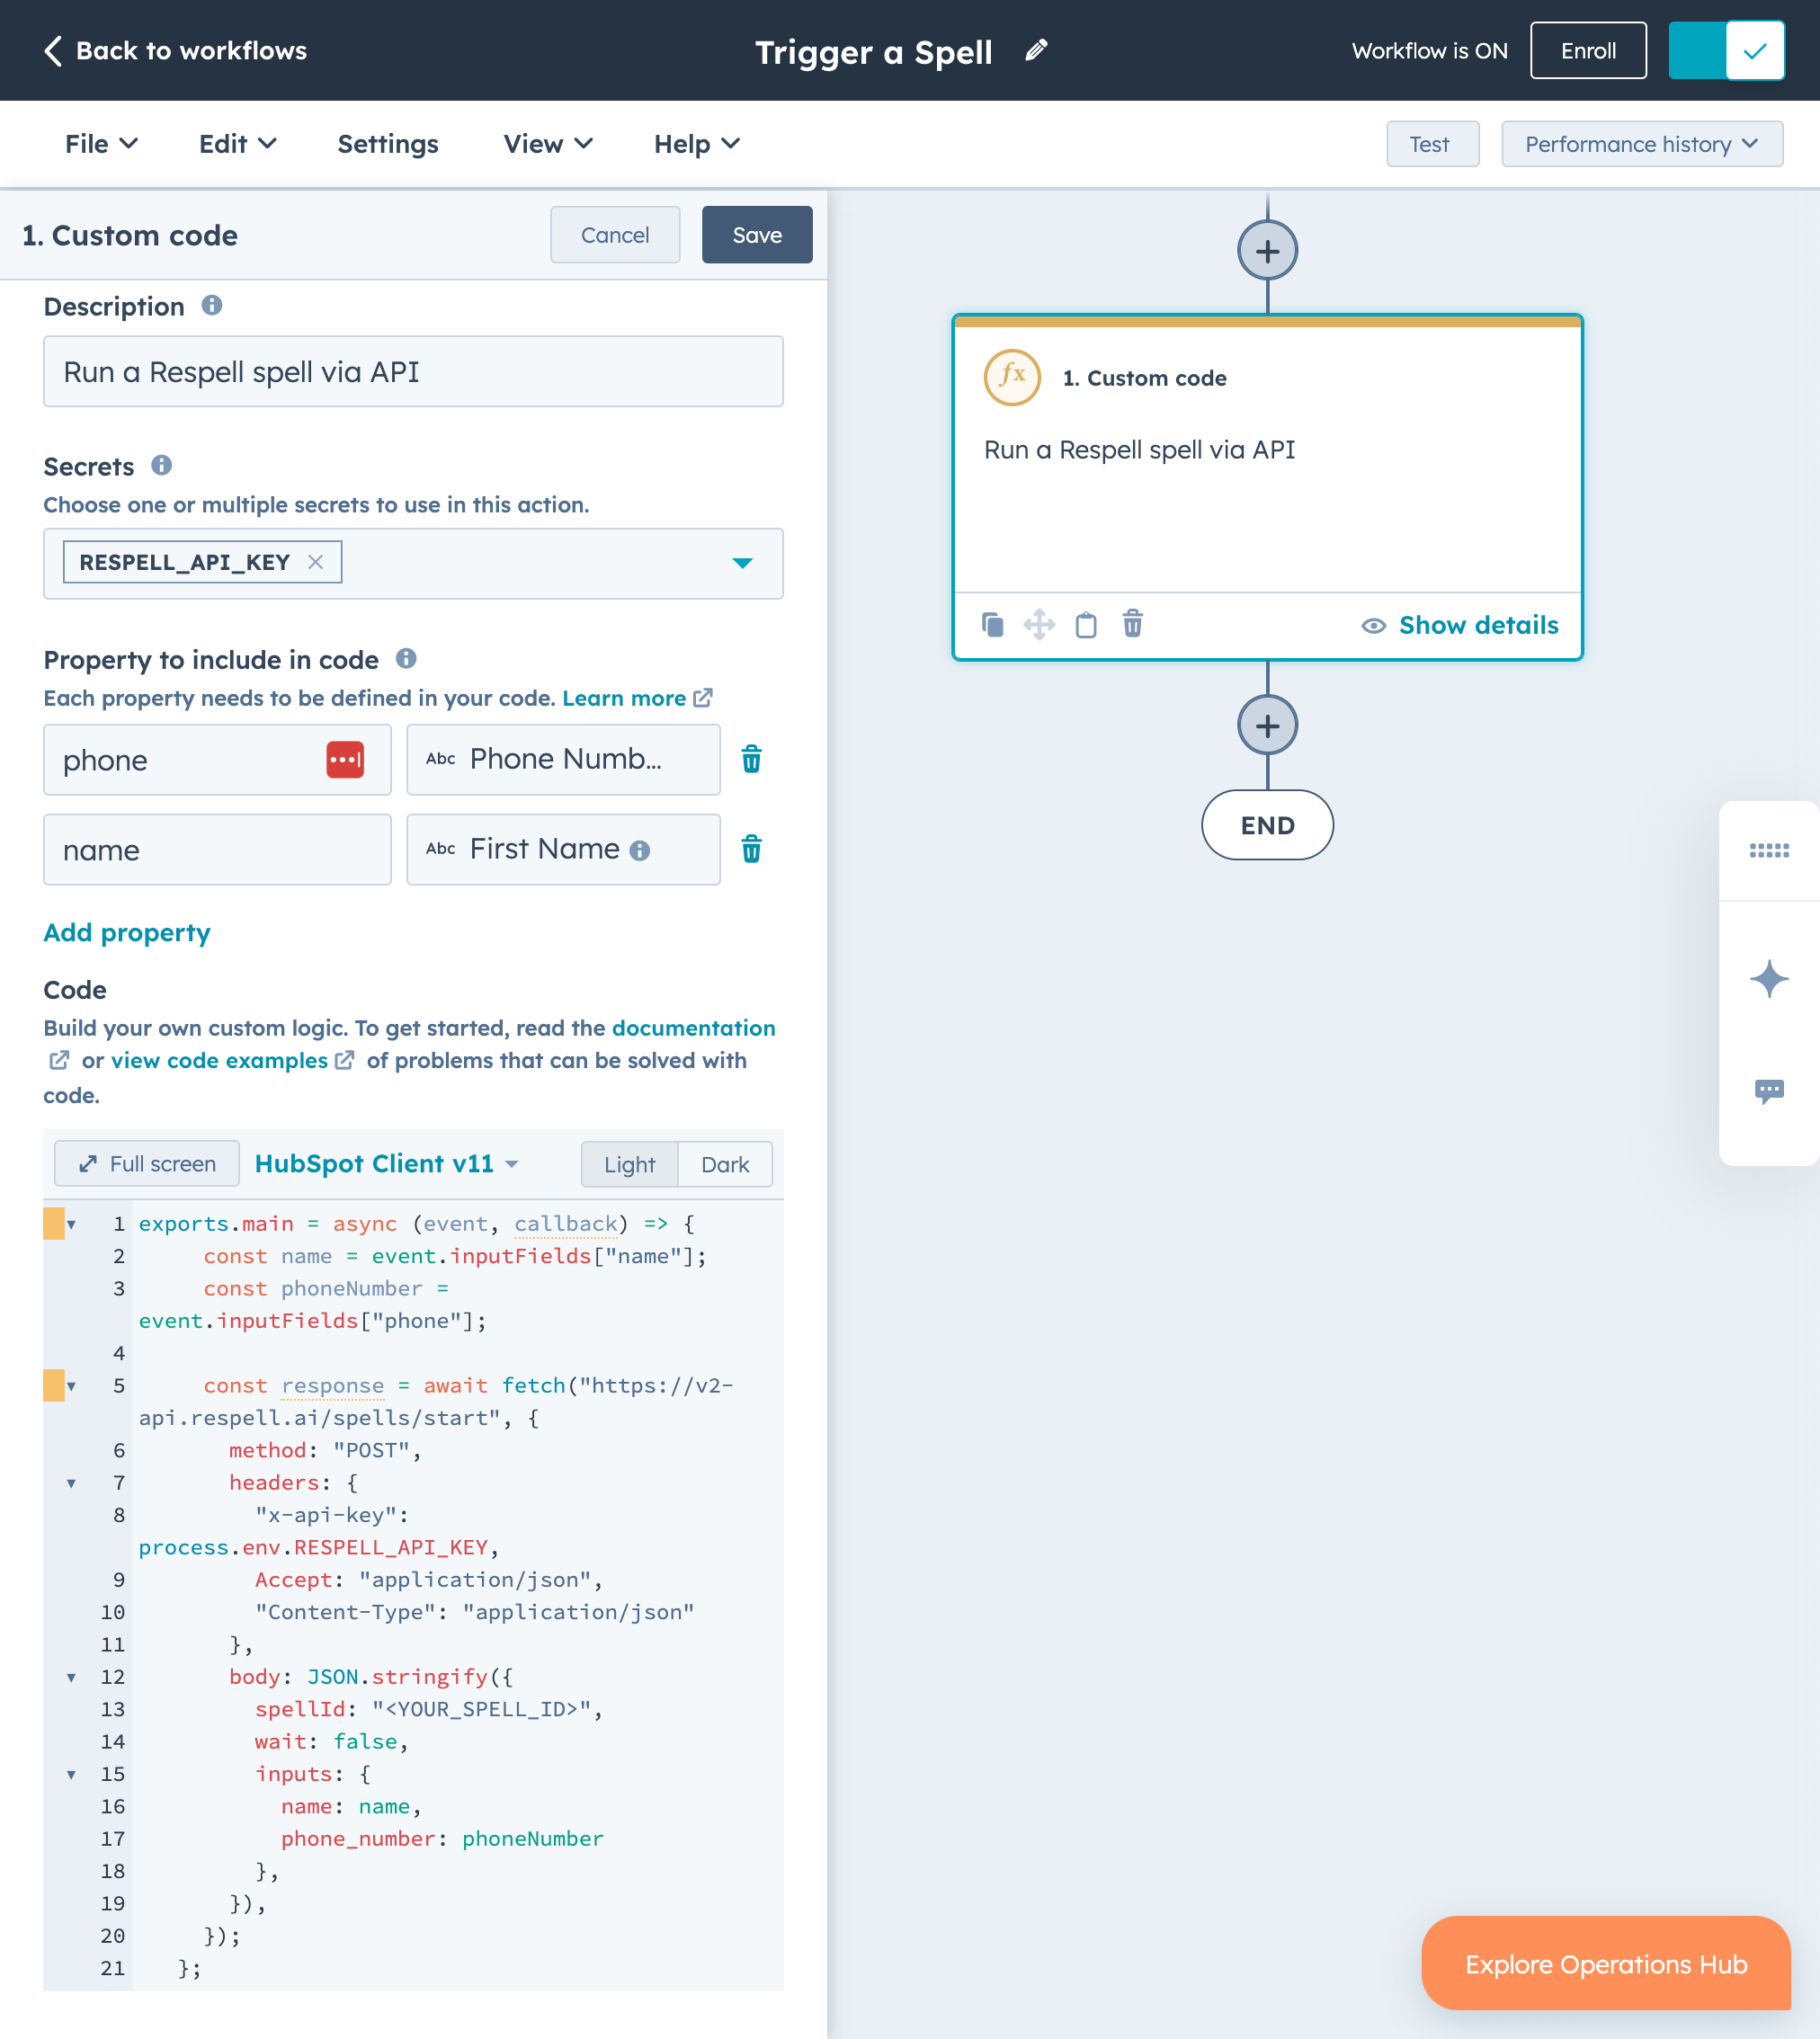
Add a Custom Code Action in Your HubSpot Workflow
- In your HubSpot account, navigate to Automation > Workflows and select the workflow you want to modify.
- Click on the + icon to add a new action and choose Custom Code under the Actions category.
-
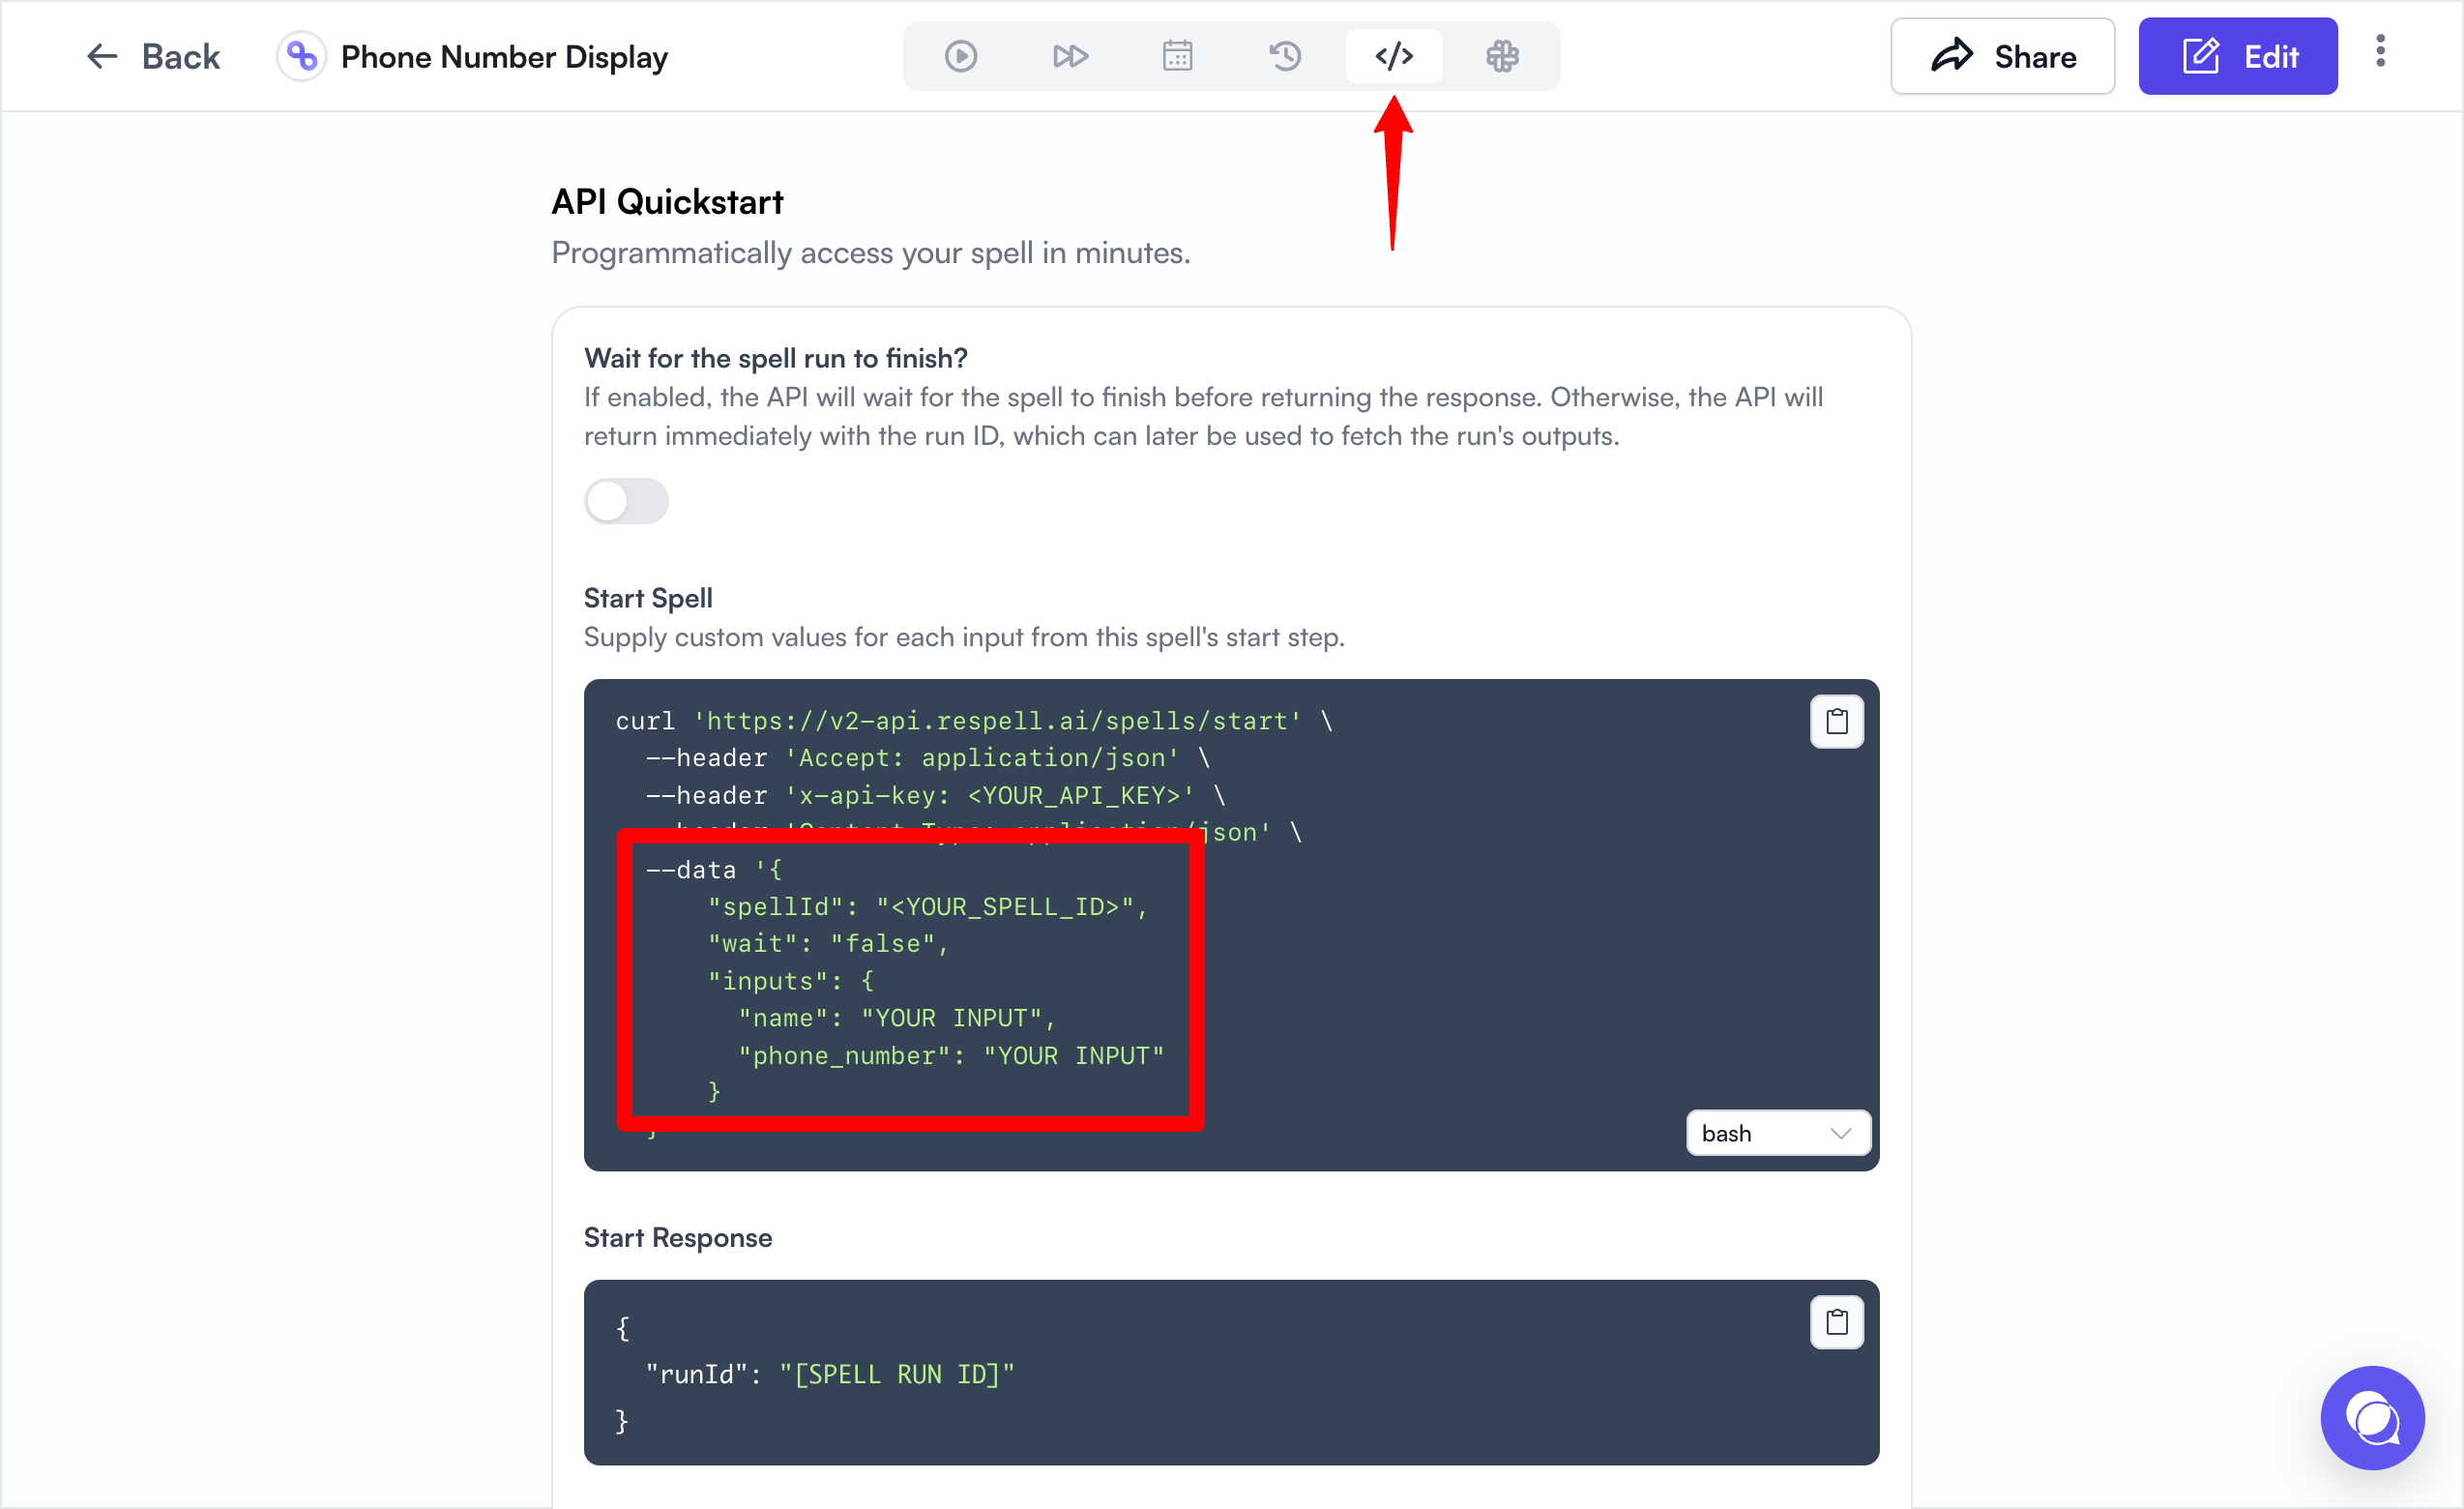
Get Your Respell API Credentials and Inputs
- Open your spell in Respell.
-
Click on the
</>API tab. -
Note your API Key, Spell ID, and Input Parameters.
-
Set the Properties to Include in the Code
- In the Custom Code action in HubSpot, specify the properties you want to use from your workflow:
- Properties to include in code: Add the names of the HubSpot properties you want to access, such as
nameandphone.
- Properties to include in code: Add the names of the HubSpot properties you want to access, such as
- These properties will be accessible in your code via
event.inputFields.
- In the Custom Code action in HubSpot, specify the properties you want to use from your workflow:
Triggering the Spell
-
Copy and Update the Code
Copy the code below and update it with your credentials from step 3.
Note: Customize this code to use any contact properties from HubSpot as inputs to your spell. Here is an example of the Custom Code action in HubSpot:
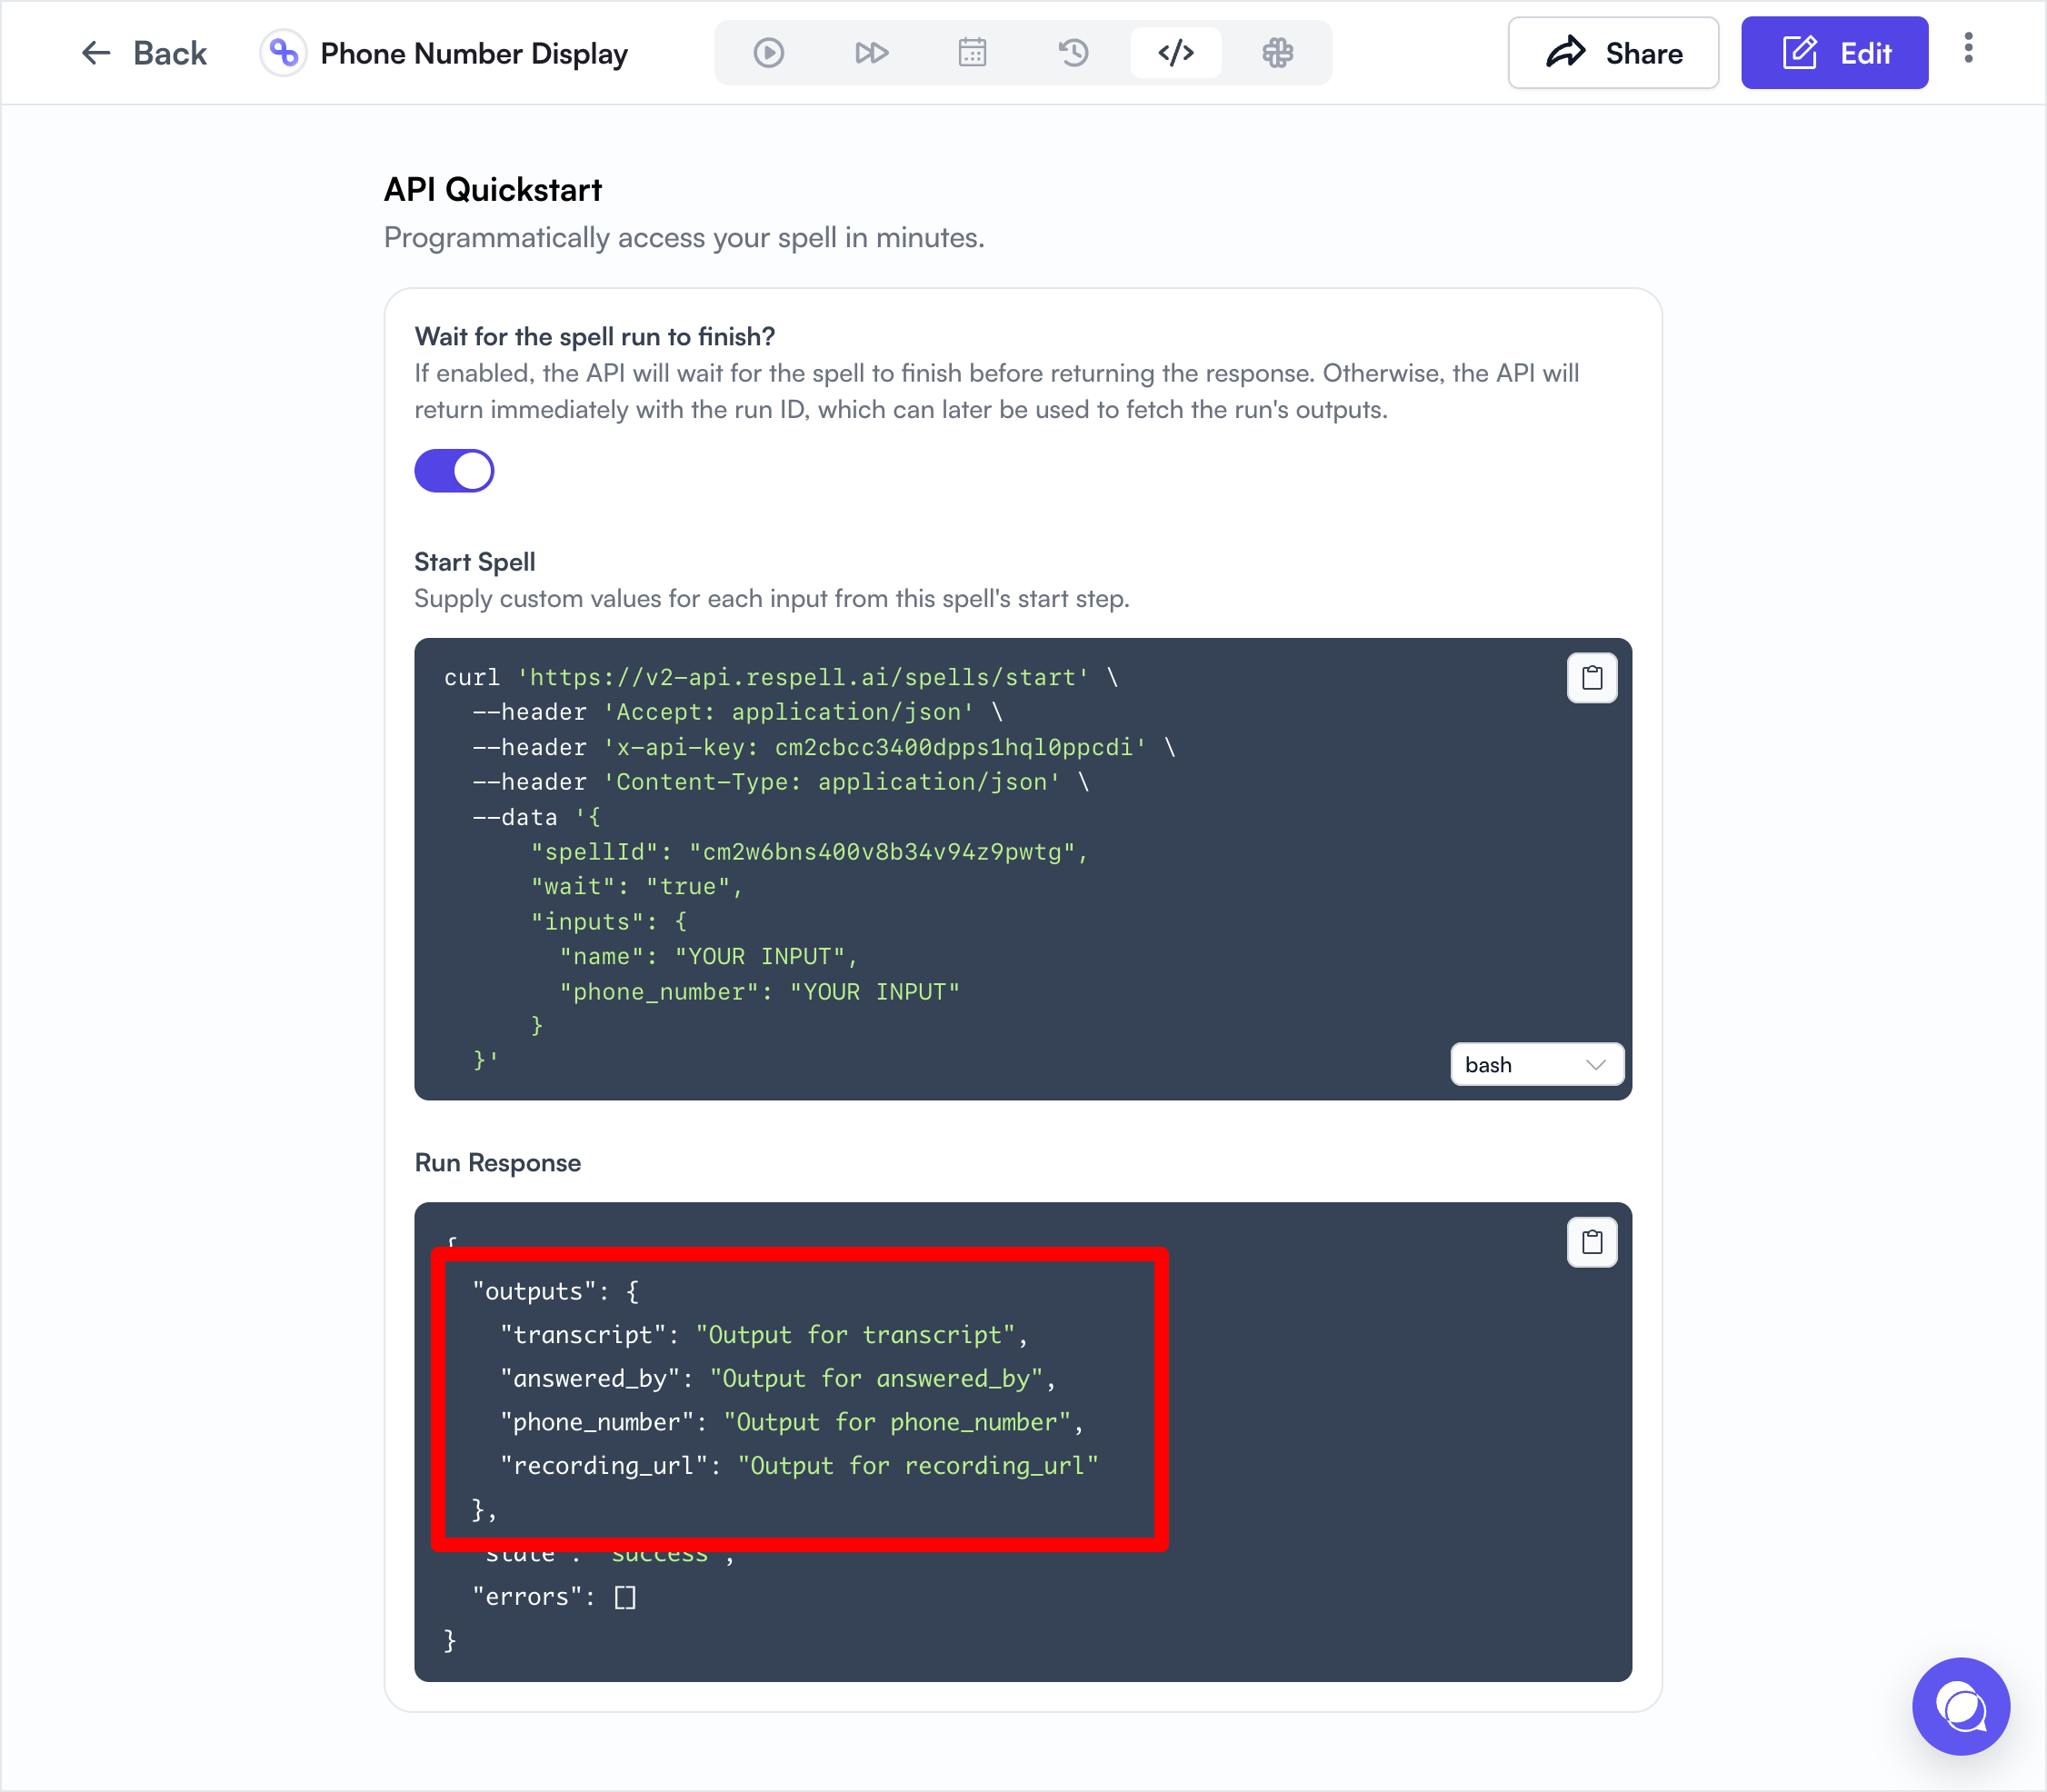
Using Display Outputs (Optional)
If you want to use the spell’s output in future steps of your HubSpot workflow, setwait: true and modify the code to handle the response.
-
Modify the Code to Wait for the Spell’s Output
Note: Ensure that the keys in
result.outputsmatch the actual output keys from your spell. -
Replace Placeholder Values
<YOUR_RESPELL_API_KEY>: Your Respell API key. It’s recommended to store this securely using HubSpot’s Secrets feature.<YOUR_SPELL_ID>: The ID of the spell you want to trigger.- Customize the
inputsobject based on your spell’s required inputs. - Adjust
transcriptandanswered_byin thecallbackfunction to match the data you need from the spell’s response.
- Open your spell in Respell.
- Important: Make sure you have a Display Outputs step in your spell.
-
Click on the
</>API tab. - Ensure the “Wait for the spell run to finish” option is checked.
-
Review the output structure displayed to identify the correct keys.
Tips
-
Use HubSpot’s Secrets Feature: Store sensitive information like your Respell API key securely by using HubSpot’s Secrets feature.
- In your Custom Code action, click on Manage Secrets and add a new secret named
RESPELL_API_KEYwith your API key as the value. - Access the secret in your code using
process.env.RESPELL_API_KEY.
- In your Custom Code action, click on Manage Secrets and add a new secret named
-
Access Workflow Data: Use
event.inputFieldsto access data from any action in your workflow, allowing you to pass dynamic data to your spell. -
Error Handling: Add error handling to manage API request failures or unexpected responses.
-
Logging for Debugging: Use
console.log()statements to log information for debugging purposes. These logs can be viewed in the workflow execution history.
Complete Example with Error Handling and Logging
- Replace
<YOUR_SPELL_ID>with your actual spell ID. - Ensure that your Respell API key is stored as a secret named
RESPELL_API_KEY.
Final Steps
- Test Your Workflow: Before activating the workflow, test it to ensure the spell is triggered correctly and the outputs are as expected.
- Use test data in your HubSpot workflow to simulate a real contact.
- Check the execution logs for any errors or warnings.
- Monitor: Keep an eye on the workflow’s execution history for any errors or issues that may arise.
- Navigate to the History tab in your workflow to see past executions.
- Review the logs for debugging information.
- Stay Updated: Regularly check for updates to the Respell API or HubSpot features that may affect your integration.
- Documentation: Refer to the Respell API Documentation and HubSpot Developer Documentation for more detailed information.